 Emma
EmmaMastering Pressure Canning: A Complete Guide to Preserving Black Beans
Unlocking the Benefits of Homemade Black Beans
Discover the ease and satisfaction of pressure canning black beans for a well-stocked pantry. By mastering this simple and rewarding process, you can ensure a consistent and nutritious food source for your family, eliminating the need for store-bought options.
When you can black beans at home, you take control of the ingredients, avoiding preservatives and additives commonly found in commercial products. Additionally, you can customize the seasoning and texture of your beans to suit your taste preferences, resulting in a superior culinary experience.
Why Homemade is Better
Explore the advantages of canning your own black beans, from cost savings to superior taste and nutrition. By investing a small amount of time and effort into homemade canning, you can save money in the long run and reduce your reliance on store-bought convenience foods.

Moreover, homemade black beans offer enhanced nutritional value compared to their canned counterparts. By preparing and canning beans at home, you retain more of their essential nutrients and flavor, ensuring that your meals are not only delicious but also wholesome and nourishing.
Gathering Essentials: Supplies and Ingredients
Essential Tools and Ingredients
Before embarking on your pressure canning journey, it's crucial to gather all the necessary supplies and ingredients. Here's a list of essential items you'll need:
TIP: Start with simple projects and gradually move on to more complex ones as you gain confidence.
- Pressure Canner: Invest in a reliable pressure canner designed specifically for home canning. Ensure it's in good condition and has a functioning pressure gauge.
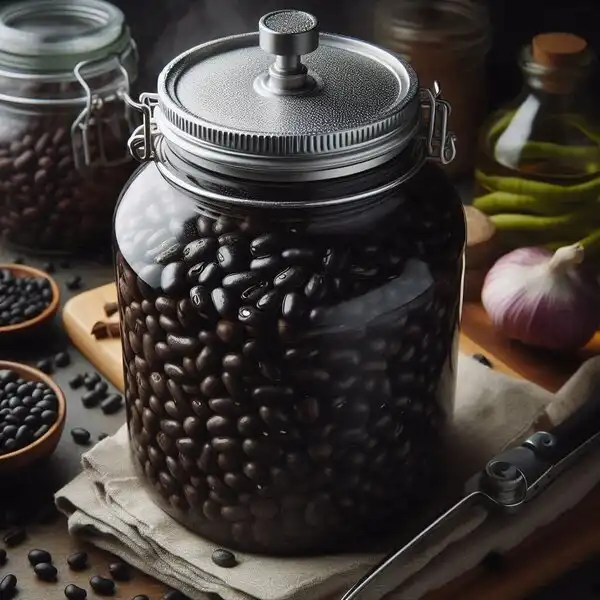
- Canning Jars: Choose high-quality glass jars suitable for canning. Mason jars are a popular option, available in various sizes to accommodate different batch sizes.
- Lids and Bands: Purchase new lids and bands for your canning jars to ensure proper sealing. Avoid reusing lids to prevent potential spoilage.
- Jar Lifter: A specialized tool for safely handling hot jars during the canning process. It provides a secure grip, reducing the risk of burns.
- Canning Funnel: Simplify the filling process by using a wide-mouthed funnel designed for canning. It helps prevent spills and keeps the jar rims clean for better sealing.
- Jar Rack: A rack that fits inside the pressure canner to hold the jars securely in place during processing. It ensures even heat distribution and prevents jars from touching the bottom of the canner.
- Other Tools: Additional tools such as a bubble remover, magnetic lid lifter, and kitchen towels are handy for achieving a successful canning experience.
Preparing Beans for Canning
Properly preparing the beans is essential to ensure safe and successful pressure canning. Follow these steps to get your beans ready:
- Sorting: Inspect the dried beans and remove any damaged or discolored ones. Also, check for debris and stones that may be present.
- Rinsing: Thoroughly rinse the beans under cold running water to remove dirt, dust, and any remaining impurities.
- Soaking: Depending on your preference and time constraints, you can either soak the beans overnight or use a quick-soak method. Soaking helps reduce cooking time and improves digestibility.
- Draining: After soaking, drain the beans and discard the soaking water. This step helps remove indigestible sugars and reduces the likelihood of digestive discomfort.
- Packaging: Once the beans are prepared, pack them into clean, sterilized jars, leaving the recommended headspace as specified in your canning recipe.
By ensuring you have the right tools and following proper preparation techniques, you'll set yourself up for a successful pressure canning experience, yielding delicious and nutritious black beans for your pantry.
The Canning Process Unveiled: Step-by-Step Instructions
Hot Pack Method Demystified
When it comes to preserving black beans through pressure canning, the hot pack method is a popular choice for its simplicity and effectiveness. Follow these step-by-step instructions to master the hot pack method:
- Prepare Your Beans: Start by sorting, rinsing, and soaking your black beans as outlined in the preparation section. Drain them thoroughly before proceeding.
- Heat Your Beans: In a large pot, cover the soaked beans with water and bring them to a gentle boil. Allow them to simmer for about 30 minutes until they are partially cooked.
- Fill Your Jars: While the beans are simmering, prepare your canning jars by washing them in hot, soapy water and sterilizing them. Once sterilized, pack the partially cooked beans into the jars, leaving the recommended headspace.
- Prepare Your Liquid: In a separate pot, prepare a brine or liquid for your beans. This can include water, broth, or a combination of both, along with seasonings like salt, garlic, and herbs.
- Add Liquid to Jars: Pour the hot liquid over the beans in each jar, ensuring that the beans are completely covered. Leave the recommended headspace at the top of each jar to allow for expansion during processing.
- Remove Air Bubbles: Use a bubble remover or non-metallic spatula to release any trapped air bubbles from the jars. This step helps ensure proper sealing and prevents spoilage.
- Apply Lids and Bands: Wipe the rims of the jars with a clean, damp cloth to remove any residue. Place new lids on the jars and secure them with bands, tightening them just until fingertip tight.
- Process Your Jars: Carefully place the filled jars into your pressure canner, ensuring they are spaced evenly and not touching each other. Process according to the recommended time and pressure for black beans.
- Remove and Cool: Once the processing time is complete, turn off the heat and allow the pressure to return to zero naturally. Carefully remove the jars from the canner and place them on a clean, dry towel to cool completely.
Optimal Storage Techniques
After successfully pressure canning your black beans, it's essential to store them properly to maintain their freshness and quality over time. Follow these best practices for optimal storage:
- Label and Date: Use waterproof labels to clearly mark each jar with the contents and the date of canning. This helps you keep track of inventory and ensures you use the oldest jars first.
- Store in a Cool, Dark Place: Choose a cool, dark storage area away from direct sunlight and heat sources. Ideally, your pantry or a cellar provides the perfect environment for long-term storage.
- Avoid Temperature Fluctuations: Fluctuations in temperature can affect the quality of canned goods. Avoid storing jars in areas prone to temperature fluctuations, such as near ovens or heaters.
- Check Seals Regularly: Periodically check the seals on your jars by pressing down on the center of the lid. If the lid is firm and does not move, the seal is intact. If it pops or moves, the jar should be refrigerated and consumed promptly.
- Rotate Your Stock: To ensure optimal freshness, rotate your canned goods regularly, using older jars first and replenishing your stock with newly canned items.
By following these step-by-step instructions and storage techniques, you can confidently master the pressure canning process and enjoy delicious, home-canned black beans year-round.
Culinary Delights: Cooking with Home-Canned Beans
Endless Culinary Possibilities
Once you've mastered the art of pressure canning black beans, you open the door to a world of culinary creativity. Home-canned black beans are incredibly versatile and can be used in a wide range of dishes, from traditional favorites to innovative creations. Here are some delicious ideas to inspire your culinary adventures:
- Classic Black Bean Soup: Start with a hearty base of home-canned black beans and add savory vegetables like onions, garlic, and bell peppers. Season with cumin, chili powder, and a touch of lime juice for a flavorful and satisfying soup.
- Black Bean Tacos: Fill warm tortillas with home-canned black beans, fresh salsa, avocado slices, and shredded cheese for a quick and delicious taco night. Top with your favorite taco toppings like cilantro, sour cream, and hot sauce for extra flavor.
- Black Bean Salad: Combine home-canned black beans with sweet corn, diced tomatoes, red onion, and chopped cilantro for a refreshing and nutritious salad. Drizzle with a zesty lime vinaigrette and serve as a side dish or light lunch.
- Black Bean Burgers: Mash home-canned black beans with cooked quinoa, breadcrumbs, and seasonings to form flavorful veggie burgers. Grill or pan-fry until golden brown and serve on whole-grain buns with your favorite toppings.
- Black Bean Dip: Blend home-canned black beans with garlic, lime juice, and spices to create a creamy and flavorful dip. Serve with tortilla chips, fresh veggies, or as a spread for sandwiches and wraps.
Expand Your Pantry
In addition to black beans, there are many other delicious foods that you can pressure can at home to enhance your pantry's variety and nutritional value. Consider experimenting with different beans, vegetables, fruits, and even meats to create a well-rounded selection of homemade staples. Some popular items for pressure canning include:
- Vegetable Soups: Create hearty soups and stews using a variety of fresh vegetables like carrots, potatoes, tomatoes, and green beans. Pressure canning allows you to enjoy homemade soups year-round, even when your favorite ingredients are out of season.
- Fruit Preserves: Capture the flavors of ripe fruits by pressure canning jams, jellies, and preserves. Whether you prefer sweet strawberry jam, tangy peach preserves, or spicy apple chutney, homemade fruit preserves are a delicious addition to any pantry.
- Meat and Poultry: Pressure canning is an excellent way to preserve lean meats and poultry for quick and easy meals. Cooked chicken, beef, and pork can be canned in their own juices or with added broth for extra flavor.
- Pickled Vegetables: Elevate your favorite dishes with homemade pickled vegetables like cucumbers, carrots, and peppers. Pressure canning preserves the crunch and flavor of fresh vegetables, creating tasty condiments for sandwiches, salads, and appetizers.
Join the Homesteading Community
Embarking on a journey of self-sufficiency through pressure canning opens the door to a vibrant community of like-minded individuals. Whether you're a seasoned homesteader or just starting out, connecting with fellow homesteaders can provide valuable support, resources, and inspiration along the way. Consider joining local homesteading groups, online forums, or social media communities to share your experiences, ask questions, and learn from others. By joining the homesteading community, you can enrich your self-sufficiency journey and cultivate a deeper connection to the food you eat and the land you steward.