 Emma
EmmaMake a Wreath: A Step-by-Step Guide to Crafting the Perfect Seasonal Decoration
Introduction to Wreath Making
This article will walk you through the process of creating a beautiful, seasonal wreath for your home, using a combination of faux and real stems. From selecting materials to adding the final touches, you'll be ready to hang your stunning wreath on your front door in no time!
Wreath making is a fun and creative activity that can add a personal touch to your home's décor. With a few simple materials and some basic crafting skills, you can create a beautiful wreath that reflects your personal style and complements your home's exterior. In this article, we'll take you through the process of making a seasonal wreath, from choosing the right materials to adding the final embellishments.
One of the best things about making your own wreath is that you can customize it to fit your personal style and the current season. Whether you're looking to create a festive holiday wreath or a beautiful spring-inspired design, the possibilities are endless. And, with a few simple tips and tricks, you can create a wreath that looks like it was made by a professional.

In the following sections, we'll dive deeper into the process of making a beautiful seasonal wreath. We'll explore the benefits of combining faux and real stems, learn how to choose the right materials, and discover the secrets to assembling a stunning wreath. So, let's get started and make a wreath that will make your home stand out!
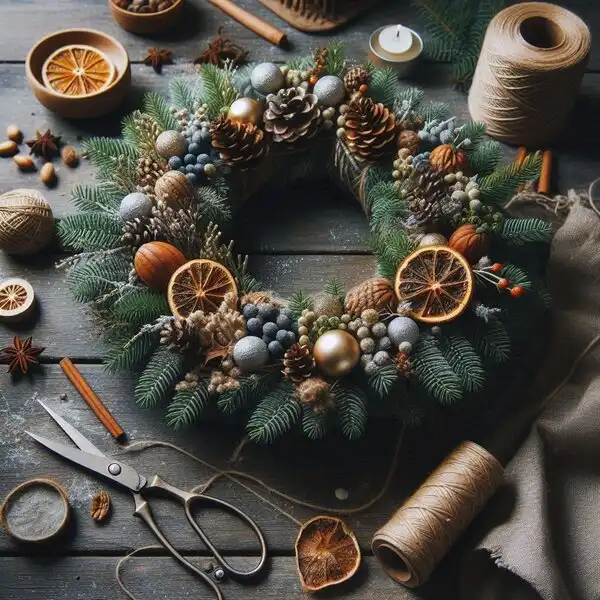
Before we begin, let's take a look at what you'll need to get started. Here's a list of basic materials you'll need to make a beautiful seasonal wreath:
- A grapevine wreath base (available at most craft stores)
- Faux stems (choose seasonal colors and textures)
- Real stems (fresh clippings from your backyard or local florist)
- Floral wire
- Wire cutters
- Bells and embellishments (optional)
With these basic materials, you'll be ready to start creating your own stunning seasonal wreath. In the next section, we'll explore the art of mixing faux and real stems to create a unique and beautiful design.
TIP: Repurpose old items and materials for your DIY projects to save money and reduce waste.
Choosing Materials: The Art of Mixing Faux and Real Stems
Why Combine Faux and Real Stems?
When it comes to creating a stunning seasonal wreath, choosing the right materials is crucial. While real stems can add a touch of authenticity, they can also be fragile and require maintenance. On the other hand, faux stems can be durable and long-lasting but may lack the natural look and feel of real stems. By combining both faux and real stems, you can create a wreath that not only looks amazing but also lasts longer and requires less maintenance.
Benefits of combining faux and real stems:
- Authentic look: Real stems add a touch of nature to your wreath, while faux stems can help to create a more uniform look.
- Durability: Faux stems can withstand the elements and last longer than real stems.
- Low maintenance: With a combination of faux and real stems, you'll spend less time replacing or maintaining your wreath.
Selecting the Right Faux Stems
When it comes to choosing faux stems, quality matters. Here are some tips to help you select high-quality faux stems that will complement your real stems:
- Choose stems with realistic colors and textures: Opt for stems that mimic the natural colors and textures of real stems.
- Look for stems with sturdy wire bases: Stems with sturdy wire bases are easier to shape and will hold their form better.
- Select stems with varying lengths and shapes: Mixing stems of different lengths and shapes will add depth and visual interest to your wreath.
Some popular types of faux stems to consider include:
- eucalyptus: Its silvery-green leaves add a pop of color and freshness to your wreath.
- fern: Fern stems can add a lush, tropical feel to your wreath.
- hydrangea: Big, blue hydrangea blooms can create a beautiful focal point in your wreath.
Gathering Fresh Clippings from Your Backyard
If you have a backyard or access to a garden, consider incorporating fresh clippings into your wreath. This will not only add an organic element to your wreath but also make it more unique and personalized.
Tips for gathering fresh clippings:
- Choose fresh, healthy stems: Select stems that are free of wilting or damage.
- Harvest in the morning: Avoid gathering clippings in the middle of the day when the sun can wilt the stems.
- Use a mixture of greens and blooms: Mixing different textures and colors will add depth and interest to your wreath.
Some popular types of fresh clippings to consider include:
- evergreen branches: Perfect for creating a lush, winter wonderland wreath.
- dried flowers: Use dried flowers like baby's breath, wheat, or oats to add a rustic touch to your wreath.
- fresh herbs: Herbs like rosemary, eucalyptus, or thyme can add a fragrant, earthy element to your wreath.
Assembling Your Wreath: A Step-by-Step Guide
Now that you have gathered all your materials, it's time to bring your wreath to life! In this section, we'll walk you through the process of assembling your wreath, step by step. From attaching stems to adding embellishments, we'll cover everything you need to know to create a stunning and cohesive look.
Attaching Stems to the Grapevine Wreath
The first step in assembling your wreath is to attach the stems to the grapevine base. You'll need floral wire, which is a flexible, thin wire that's perfect for this purpose. Start by selecting a few stems, both faux and real, and grouping them together. Hold the stems against the grapevine wreath, positioning them where you want them to sit.
Next, take a piece of floral wire and wrap it around the stems, securing them to the grapevine wreath. Make sure the wire is tight enough to hold the stems in place, but not so tight that it damages the stems or the wreath. Repeat this process, adding more stems to the wreath, working your way around the circle.
As you add more stems, make sure to vary the heights and angles to create a natural, organic look. You can also experiment with different textures and colors to add depth and interest to your wreath.
Adding Bells and Embellishments
Once you've attached all the stems, it's time to add some festive bells and embellishments to give your wreath a personalized touch. You can use small bows, ribbons, or ornaments to add a pop of color and interest to your wreath.
Start by selecting the embellishments you want to use, and then attach them to the wreath using floral wire or a hot glue gun. Be careful not to overdo it, as too many embellishments can make your wreath look cluttered and overwhelming.
Instead, focus on adding a few statement pieces that draw the eye to different areas of the wreath. For example, you could add a small bow to the top of the wreath, or a few ornaments to the sides.
Filling Gaps and Securing the Wreath
As you've been adding stems and embellishments, you may have noticed some gaps or bare spots on the wreath. Now it's time to fill those gaps and secure the wreath to make sure everything stays in place.
Start by fluffing out the grapevine wreath, making sure it's evenly distributed and there are no bare spots. Then, take some of the smaller stems or foliage and use them to fill in any gaps. You can also use some floral wire to attach any stray stems or embellishments that may be loose.
Finally, take a step back and evaluate your wreath. Make any necessary adjustments to the stems or embellishments, and fluff out the grapevine wreath one last time. Your wreath is now complete and ready to be displayed!
In the next section, we'll cover the final step in the wreath-making process: displaying your masterpiece. From hanging your wreath on the front door to creating a themed vignette, we'll show you how to showcase your beautiful wreath and make a stunning impression.
Displaying Your Masterpiece: Tips for Hanging Your Wreath
Hanging Your Wreath on the Front Door
Now that you've put in the time and effort to create your beautiful seasonal wreath, it's time to show it off! Hanging your wreath on the front door is a classic way to make a stunning first impression on guests and add some curb appeal to your home. But before you start hammering away, make sure you have the right tools and follow a few simple tips to ensure your wreath is securely fastened and looking its best.
First, choose a sturdy wreath hanger that can support the weight of your wreath. You can find wreath hangers in various materials, such as metal, wood, or plastic, and in different styles to match your home's exterior. If you don't have a wreath hanger, you can also use a sturdy nail or screw, but be sure to check with your landlord or homeowner's association if you're renting or have any restrictions.
Next, determine the best spot to hang your wreath. Typically, the center of the door is the most visually appealing, but you can also hang it slightly above or below the center, depending on the design of your door and the size of your wreath. Make sure to measure the width of your door and the diameter of your wreath to ensure a balanced look.
When hanging your wreath, start by attaching the hanger to the door, then gently place the wreath on the hanger. Adjust the wreath as needed to ensure it's level and evenly spaced. Finally, add any finishing touches, such as fluffing out the stems or adjusting the embellishments.
Additional Tips for Displaying Your Wreath
While hanging your wreath on the front door is a classic choice, there are many other creative ways to display your masterpiece. Here are a few ideas to get you started:
- Use it as a centerpiece: Place your wreath in the center of your dining table or coffee table to add a pop of color and create a festive atmosphere.
- Create a themed vignette: Group your wreath with other seasonal decorations, such as pumpkins, candles, or vases, to create a cohesive and inviting display.
: If you don't have a door or prefer a more subtle look, consider hanging your wreath on a wall or mantle. This is especially effective in small spaces or apartments. : Use a suction cup or adhesive hook to hang your wreath on a mirror or window, adding a touch of elegance and sophistication to your decor.
Conclusion and Call to Action
With these simple steps, you'll be displaying your beautiful wreath like a pro! Remember to have fun and be creative with your wreath-making and displaying. Share your wreath-making experiences and tips in the comments below, and don't forget to show off your finished wreath on social media using hashtags like #wreathmaking or #seasonaldecor.
Happy crafting, and I'll see you in the next article!