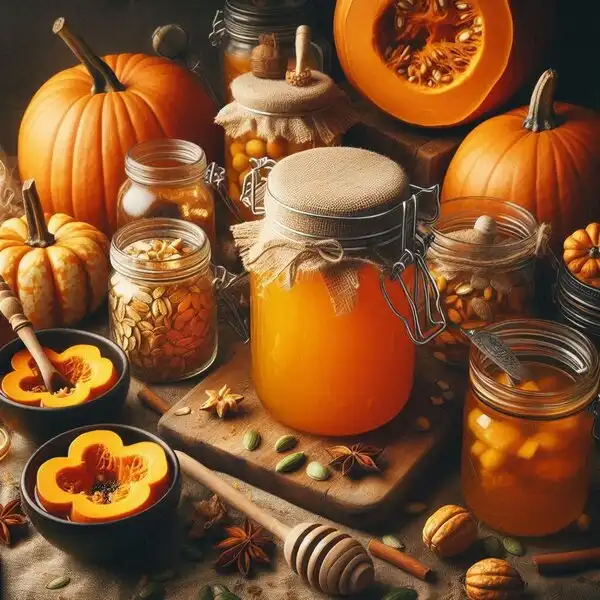
Preserving Autumn's Bounty: A Beginner's Guide to Pressure Canning Pumpkin
Welcome to the homesteader's kitchen, where tradition meets innovation. In this guide, we'll delve into the time-honored practice of canning, focusing specifically on the art of pressure canning pumpkin. Whether you're a seasoned homesteader or just starting out on your self-sufficient journey, understanding the basics of canning is essential.
The Homesteader's Tradition: Understanding Canning Basics
At the heart of homesteading lies the age-old tradition of preserving seasonal abundance. Canning is not just a practical skill; it's a way of life. By harnessing the power of canning, homesteaders can extend the shelf life of their harvest, ensuring that nothing goes to waste. From fruits to vegetables to meats, the possibilities are endless.
But what exactly is canning? At its core, canning is the process of sealing food in airtight containers to prevent spoilage. By creating a sterile environment, we can safely store perishable foods for months or even years. While there are various methods of canning, pressure canning reigns supreme for low-acid foods like pumpkin.

Why Pressure Canning Pumpkin is Essential for Every Homesteader
When it comes to preserving pumpkin, pressure canning is the gold standard. Unlike water bath canning, which relies on high acidity to prevent bacterial growth, pressure canning uses steam under pressure to reach higher temperatures. This is crucial for eliminating harmful microorganisms, ensuring that your canned pumpkin stays safe to eat.
But why should every homesteader embrace pressure canning pumpkin? The answer lies in versatility and convenience. By stocking your pantry with home-canned pumpkin, you gain instant access to a versatile ingredient that can elevate countless dishes. From pies to soups to smoothies, the possibilities are endless.
TIP: Always read through the entire recipe before starting to ensure you have all the necessary ingredients and tools.
Choosing the Perfect Pumpkins for Canning Success
Before you can dive into the world of pressure canning pumpkin, you need to start with the right ingredients. Not all pumpkins are created equal when it comes to canning. Look for small sugar or pie pumpkins, which are sweeter and less stringy than their larger counterparts.
When selecting pumpkins for canning, opt for ones that are fully ripe and free from blemishes. A firm rind and heavy weight are good indicators of quality. By choosing the best pumpkins, you set yourself up for canning success and ensure a delicious end product.
Unlocking Pumpkin's Versatility: Creative Recipes for Canned Pumpkin
Now that you've mastered the art of pressure canning pumpkin, it's time to explore the endless culinary possibilities that canned pumpkin brings to your kitchen. From comforting classics to innovative creations, canned pumpkin can elevate your dishes to new heights. Let's dive into some creative recipes that will make your taste buds sing.
From Pies to Pastas: Delicious Ways to Use Canned Pumpkin
When it comes to using canned pumpkin, the classic pumpkin pie is just the beginning. Expand your culinary horizons by incorporating pumpkin into savory dishes like creamy pumpkin soup or hearty pumpkin chili. For a breakfast treat, whip up a batch of pumpkin pancakes or indulge in pumpkin spice oatmeal. The sweet and earthy flavor of pumpkin pairs beautifully with a variety of ingredients, making it a versatile addition to any meal.
If you're feeling adventurous, experiment with international flavors by adding pumpkin to dishes like Thai pumpkin curry or Mexican pumpkin mole. The subtle sweetness of pumpkin balances out spicy and savory flavors, adding depth and complexity to your cooking. Don't be afraid to get creative and let your imagination run wild!
Making the Switch: Transitioning to Home-Canned Pumpkin
Transitioning from store-bought to home-canned pumpkin is a game-changer for any kitchen. Not only does homemade pumpkin puree taste fresher and more flavorful, but it also gives you complete control over the ingredients. Say goodbye to preservatives and additives and hello to pure, wholesome pumpkin goodness.
Start by substituting canned pumpkin for store-bought in your favorite recipes, adjusting the seasoning to taste. You'll notice a difference in texture and flavor right away, as homemade pumpkin puree has a richer, more vibrant taste. Once you experience the superior quality of home-canned pumpkin, you'll never go back to the canned stuff again.
Safety First: Tips for Ensuring Safe Canning Practices
While pressure canning pumpkin is a safe and effective way to preserve this seasonal staple, it's essential to follow proper safety precautions to prevent foodborne illness. Always use tested recipes from reputable sources and follow them to the letter, paying close attention to processing times and pressure levels.
Additionally, be sure to inspect your canned pumpkin for signs of spoilage before consuming it. Look for any changes in color, texture, or odor, as these can indicate bacterial growth or contamination. When in doubt, throw it out - it's better to be safe than sorry when it comes to food safety.
Step-by-Step Guide: Mastering the Art of Pressure Canning Pumpkin
Welcome to the heart of pressure canning pumpkin - the step-by-step guide that will empower you to preserve this autumn delight with confidence. Follow these essential steps, and soon you'll be filling your pantry with jars of golden goodness, ready to elevate your recipes throughout the year.
Essential Supplies for Successful Canning
Before you begin your pressure canning journey, ensure you have all the necessary supplies on hand. Here's what you'll need:
- Pressure canner: A large pot with a tight-fitting lid and a rack to keep jars off the bottom.
- Canning jars: Choose jars specifically designed for canning, ensuring they are free from cracks or chips.
- Canning lids and bands: Use new lids for each canning session to ensure a proper seal.
- Canning tools: A jar lifter, funnel, and bubble remover are essential for safe and efficient canning.
- Pumpkin: Select ripe, firm pumpkins for the best results. Small sugar or pie pumpkins are ideal for canning.
- Additional ingredients: Depending on your recipe, you may need lemon juice, salt, or spices to enhance flavor and safety.
Expert Tips and Tricks for Seamless Canning
Now that you have your supplies assembled, it's time to dive into the canning process. Follow these expert tips to ensure a smooth and successful experience:
- Sanitize your equipment: Before starting, wash your jars, lids, and canning tools in hot, soapy water and rinse thoroughly.
- Prepare your pumpkin: Wash the pumpkins thoroughly, then remove the stem, seeds, and fibrous strands. Cut the pumpkin into uniform cubes for even processing.
- Follow tested recipes: Stick to trusted canning recipes from reliable sources to ensure safety and quality. Avoid improvising or altering ingredients, especially when it comes to processing times and acidity levels.
- Monitor pressure and processing times: Maintain a consistent pressure level throughout the canning process, adjusting heat as needed. Follow the recommended processing times for your altitude to ensure proper preservation.
- Allow jars to cool naturally: After processing, remove the jars from the canner and place them on a towel-lined surface to cool. Avoid disturbing or moving the jars until they have cooled completely.
A Visual Walkthrough: Easy Steps to Canning Pumpkin
Now, let's walk through the canning process step by step:
- Prepare your pressure canner according to the manufacturer's instructions, ensuring the rack is in place and the water level meets the recommended depth.
- Fill your sanitized jars with cubed pumpkin, leaving a one-inch headspace at the top.
- Wipe the jar rims clean with a damp cloth, then place the lids on top and screw on the bands fingertip-tight.
- Lower the filled jars into the canner using a jar lifter, ensuring they are spaced evenly and not touching each other or the sides of the canner.
- Secure the lid of the pressure canner and bring the water to a boil, allowing steam to vent for 10 minutes before placing the weight or closing the vent.
- Process the jars at the recommended pressure and processing time for your altitude, adjusting heat as needed to maintain pressure.
- Once the processing time is complete, turn off the heat and allow the pressure to return to zero naturally before removing the weight or opening the vent.
- Carefully remove the jars from the canner using a jar lifter and place them on a towel-lined surface to cool completely.
- Once cooled, check the seals, label the jars with the contents and date, and store them in a cool, dark place for long-term storage.
Conclusion: Elevate Your Homesteading Experience with Canned Pumpkin
Congratulations on completing your journey into the world of pressure canning pumpkin! By mastering this skill, you've unlocked a treasure trove of possibilities for enhancing your homesteading experience and enjoying the flavors of autumn year-round.
As you reflect on your newfound knowledge, remember that pressure canning pumpkin is more than just a preservation technique—it's a gateway to creativity and convenience in the kitchen. Whether you're whipping up a batch of homemade pumpkin soup on a chilly evening or surprising your family with a decadent pumpkin pie for dessert, your canned pumpkin will be there to elevate every dish.
We invite you to continue exploring the joys of homesteading and preserving by joining our vibrant community of like-minded individuals. Share your successes, swap recipe ideas, and find inspiration for your next project. Together, we can cultivate a thriving homesteading community where everyone has the tools and support they need to succeed.
Stay connected with us by subscribing to our newsletter for weekly homesteading tips, tricks, and updates. Whether you're a seasoned homesteader or just beginning your journey, there's always something new to learn and discover. Let's embark on this adventure together and continue to grow, learn, and thrive.

 Emma
Emma

