 Emma
EmmaHomemade Butter: Your Complete Guide
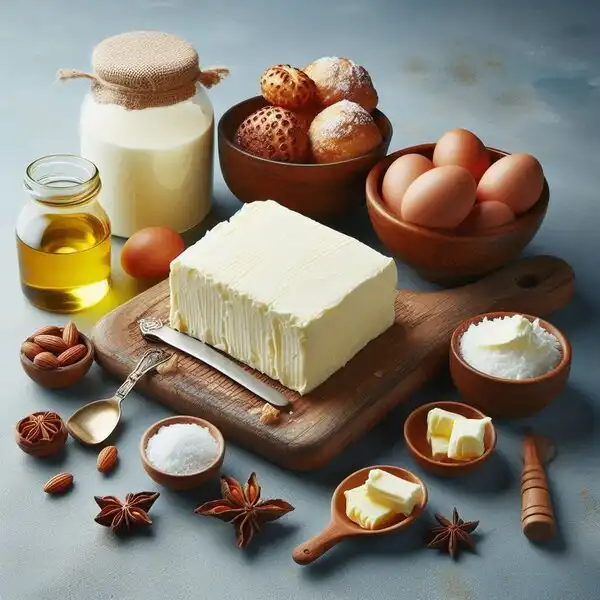
Welcome to your comprehensive guide on making delicious homemade butter! In this section, we'll explore three easy methods that allow you to create creamy butter right in your own kitchen. Additionally, we'll discuss the essential equipment you'll need to get started on your butter-making journey.
Discover Three Easy Methods to Make Butter at Home
Making butter at home is easier than you might think! We'll walk you through three simple methods that cater to different preferences and kitchen setups. Whether you prefer the traditional mason jar method or want to explore using a mixer, we've got you covered.
- Mason Jar Method: This classic method involves shaking cream in a sealed mason jar until it separates into butter and buttermilk. It's a fun and interactive way to involve the whole family in the butter-making process.
- Kitchen Mixer Method: If you prefer a hands-off approach, using a kitchen mixer can speed up the butter-making process. With the right attachment, you can whip cream into butter with ease.
- Electric Butter Churn Method: For larger batches of butter, an electric butter churn is a convenient option. While not necessary for small-scale butter making, it's a valuable tool for homesteaders or those with abundant cream to churn.
Essential Equipment for Homemade Butter Making
While making butter at home is relatively simple, having the right equipment can streamline the process and ensure excellent results. Here are the essential tools you'll need:

| Equipment | Description |
|---|---|
| Mason Jar | A sturdy glass jar with a tight-fitting lid for shaking cream into butter. |
| Kitchen Mixer | An electric mixer with whisk or paddle attachments for whipping cream. |
| Electric Butter Churn | A specialized appliance for churning larger quantities of cream into butter. |
| Cream | The main ingredient for making butter. Use either raw cream or store-bought heavy cream. |
With these basic tools on hand, you'll be ready to embark on your butter-making adventure!
Sweet Cream vs. Cultured Butter: Choosing the Best Option
When it comes to making butter at home, one of the first decisions you'll need to make is whether to use sweet cream or cultured cream. While both options result in delicious butter, there are some key differences to consider.
TIP: Experiment with herbs and spices to add unique flavors and enhance your dishes.
Understanding the Difference Between Sweet Cream and Cultured Cream
Sweet cream butter is made directly from fresh cream without any additional fermentation. This means that the cream is simply churned until it separates into butter and buttermilk. On the other hand, cultured cream butter involves fermenting the cream before churning it into butter. This fermentation process adds depth of flavor and enhances the butter's nutritional profile.
- Flavor: Sweet cream butter tends to have a mild, sweet flavor, while cultured cream butter has a slightly tangy taste due to the fermentation process.
- Texture: Cultured butter often has a creamier texture and a richer mouthfeel compared to sweet cream butter.
- Nutritional Benefits: Cultured butter contains live cultures, which are beneficial for gut health and digestion. It also tends to have higher levels of vitamins and minerals compared to sweet cream butter.
Benefits of Cultured Butter: Health and Consistency Explained
Choosing cultured butter not only adds depth of flavor to your dishes but also offers several health benefits. The live cultures present in cultured butter can help support a healthy gut microbiome, improving overall digestion and nutrient absorption. Additionally, the fermentation process helps break down lactose and other sugars, making cultured butter easier to digest for those with lactose sensitivities.
Furthermore, cultured butter tends to have a more consistent flavor and texture compared to sweet cream butter. The fermentation process helps develop complex flavors and aromas, resulting in a butter that enhances the taste of any dish it's used in.
Mastering Butter Making: Tips & Tricks for Success
Now that you've chosen your cream and decided whether to go for sweet cream or cultured butter, it's time to dive into the nitty-gritty of butter making. While the process itself is relatively simple, mastering the art of churning requires attention to detail and a few insider tips.
Find out everything you need to know about Everything you need to know about pork rillette homestead kitchen in our detailed article. It's a valuable resource for anyone looking to learn more.
Optimal Cream Temperature: Key to Perfect Churning
One of the most critical factors in butter making is the temperature of your cream. For optimal churning, aim to work with cream that is around 62-63 degrees Fahrenheit. If the cream is too cold, it will take longer to churn and may result in a less consistent texture. On the other hand, if the cream is too warm, the butter may become slimy and challenging to work with. Use a thermometer to ensure your cream is at the perfect temperature before starting the churning process.
Getting the Proportions Right: Volume to Vessel Ratio
Another essential aspect of successful butter making is getting the proportions right. When filling your churn or jar with cream, be mindful not to overfill it. Aim to fill the container no more than halfway to allow enough room for the cream to expand and move around as it churns. The sloshing motion created during churning is what transforms the cream into butter, so leaving adequate space is crucial for achieving the desired results.
Stop Churning at the Right Time: Achieving the Ideal Consistency
Knowing when to stop churning is perhaps the most challenging part of making butter. It can be tempting to keep churning beyond the point of separation, but doing so can result in overworked butter with a less desirable texture. Look for visual cues that indicate the butterfat has separated from the buttermilk, such as the cream becoming grainy and thick. Once you notice these signs, continue churning until the butterfat clumps together into a solid mass. Be careful not to overmix, as this can cause the butter to separate again and ruin your final product.
Explore our extensive write-up on Delve into carrot seed germination tips and discover all the nuances and important details. It's an engaging read filled with useful knowledge.
Enhance Your Butter-Making Experience: Washing, Salting, and Storing
Now that you've successfully churned your homemade butter, it's time to take your butter-making journey to the next level by focusing on the final steps: washing, salting, and storing. These steps are crucial for enhancing the flavor, freshness, and longevity of your butter.
Importance of Washing Your Butter Thoroughly
Washing your butter is a critical step that helps remove excess buttermilk, which can cause your butter to spoil more quickly. To wash your butter, place it in a bowl of ice-cold water and knead it gently with your hands. As you knead, you'll notice the water becoming cloudy, indicating the removal of buttermilk. Continue kneading and changing the water until it remains clear. Properly washed butter will have a longer shelf life and a cleaner, fresher taste.
Salting Your Butter: Preserving Flavor and Freshness
Adding salt to your butter not only enhances its flavor but also acts as a natural preservative, extending its shelf life. When salting your butter, use a high-quality salt such as sea salt or kosher salt, and sprinkle it evenly over the surface of the butter. The amount of salt you use will depend on your personal preference, but a good starting point is around 1/4 teaspoon per stick of butter. Mix the salt into the butter thoroughly, ensuring it is evenly distributed. Salted butter can be used immediately or stored for later use.
Proper Storage Techniques for Longevity
Proper storage is essential for maintaining the freshness and flavor of your homemade butter. To store your butter, wrap it tightly in wax paper or parchment paper, then place it in an airtight container or resealable plastic bag. Store your butter in the refrigerator for short-term use, or in the freezer for longer-term storage. If freezing your butter, be sure to label it with the date to keep track of its freshness. Properly stored butter can last for several months in the freezer without losing its flavor or quality.
Utilizing Leftover Buttermilk: Tips and Ideas
Don't let the leftover buttermilk from your butter-making process go to waste! Buttermilk is a versatile ingredient that can be used in a variety of recipes, from pancakes and biscuits to salad dressings and marinades. You can also use it as a tenderizing agent for meats or as a base for creamy soups and sauces. Get creative with your leftover buttermilk and experiment with different recipes to make the most of this valuable ingredient.
Conclusion and Next Steps
Congratulations! You've now mastered the art of making homemade butter from start to finish. By following these tips for washing, salting, and storing your butter, you can enhance its flavor, freshness, and longevity, ensuring that you always have delicious, homemade butter on hand whenever you need it. Now that you've completed your butter-making journey, feel free to explore new recipes and techniques to continue honing your skills in the kitchen.