 Emma
EmmaMastering Homemade Pie Crust: A Foolproof Recipe
1. Introduction
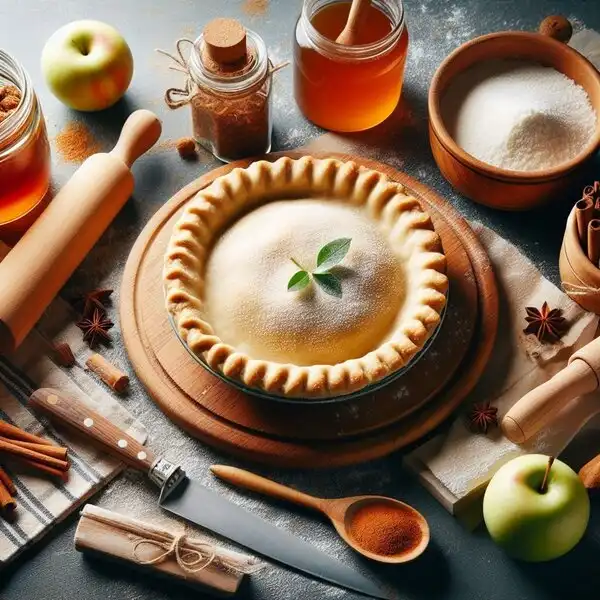
In the realm of baking, few things hold as much importance as a dependable pie crust. Whether you're crafting a sweet fruit pie or a savory pot pie, the crust sets the stage for culinary excellence. In this article, we delve into the art of mastering homemade pie crust, offering a recipe that's both foolproof and versatile.
The Significance of a Reliable Pie Crust
A pie crust isn't merely a vessel for holding filling; it's a crucial component that can make or break your culinary creation. Picture a flaky, buttery crust cradling a luscious fruit filling or a hearty meat stew. It's the foundation upon which the entire pie experience rests.
Overview of the Recipe
At the heart of this article lies a simple yet remarkable homemade pie crust recipe. With just four basic ingredientsflour, butter, sugar, and saltyou can achieve pie crust perfection. This recipe is not only easy to master but also incredibly versatile, suitable for a myriad of pie varieties.

Key Takeaways:
- A reliable pie crust is essential for achieving culinary excellence in both sweet and savory pies.
- The article focuses on a homemade pie crust recipe that requires only four simple ingredients.
- The recipe offers versatility and can be used for various pie creations.
FAQs:
Q: Why is a pie crust important in baking? A: A pie crust serves as the foundation for pies, providing structure and texture to the final baked product.
Q: What makes this homemade pie crust recipe special? A: This recipe stands out for its simplicity, requiring just four basic ingredients, yet delivers exceptional results every time.
TIP: Season your food throughout the cooking process, not just at the end, to build layers of flavor.
Q: Can this pie crust recipe be customized for different pies? A: Yes, this versatile recipe can be adapted to suit both sweet and savory pie fillings, making it a go-to for all your pie-making endeavors.
Q: Is this pie crust suitable for freezing? A: Absolutely! This pie crust freezes well, making it convenient for meal prep or holiday baking marathons.
Conclusion:
As we embark on this journey to master homemade pie crust, remember that simplicity often yields the most delightful results. With a handful of basic ingredients and a touch of culinary finesse, you can elevate your pies to new heights of deliciousness.
Mastering Homemade Pie Crust: A Foolproof Recipe
2. Why I Love This Recipe
When it comes to crafting delectable pies, having a reliable and versatile crust recipe is paramount. Allow me to share my personal journey with this homemade pie crust recipe and why it has become an indispensable staple in my kitchen.
Testimonial: A Baker's Best Friend
As an avid baker, I've experimented with countless pie crust recipes over the years. However, none have captivated me quite like this one. What sets it apart is its exceptional versatility and reliability. Whether I'm whipping up a classic apple pie or indulging in a savory quiche, this crust never fails to deliver impeccable results.
From Sweet to Savory: Endless Possibilities
One of the reasons I adore this recipe is its suitability for a wide range of dishes. From delicate fruit tarts to hearty chicken pot pies, this crust adapts effortlessly to whatever filling I choose. Its neutral flavor profile complements both sweet and savory fillings, making it a versatile canvas for culinary creativity.
Freezer Storage: A Time-Saving Solution
In today's fast-paced world, convenience is key, especially during busy holiday seasons. What truly makes this recipe a game-changer is its freezer storage capability. By preparing large batches of pie crust in advance and storing them in the freezer, I can streamline my baking process and whip up homemade pies at a moment's notice.
Key Takeaways:
- This homemade pie crust recipe offers versatility and reliability, making it a go-to for various dishes.
- Its neutral flavor profile makes it suitable for both sweet and savory pies.
- Freezer storage capability allows for convenient meal prep and impromptu baking sessions.
FAQs:
Q: Can this pie crust recipe be used for sweet and savory pies alike? A: Yes, this versatile recipe pairs well with a variety of fillings, ranging from fruity to savory.
Q: How far in advance can I prepare and freeze the pie crust? A: You can prepare the pie crust ahead of time and store it in the freezer for up to several months. Simply thaw before use.
Q: Does freezing the pie crust affect its texture or flavor? A: When properly stored, the pie crust maintains its texture and flavor, ensuring delicious results every time.
Q: Can I customize this pie crust recipe with different flavorings or ingredients? A: Absolutely! Feel free to experiment with additions such as herbs, spices, or flavored extracts to tailor the crust to your preferences.
Mastering Homemade Pie Crust: A Foolproof Recipe
3. How to Make Pie Crust
Now that we've established the significance of a dependable pie crust and explored why this particular recipe shines, it's time to dive into the nitty-gritty of crafting your own homemade pie crust. Follow along as we break down the process into simple, easy-to-follow steps.
Step-by-Step Guide:
Step 1: Gather Your Ingredients
Before you begin, ensure you have all the necessary ingredients on hand:
Find out everything you need to know about Comprehensive guide to responsible kids chores in our detailed article. It's a valuable resource for anyone looking to learn more.
- Flour: All-purpose flour works best for this recipe.
- Butter: Opt for unsalted butter, chilled and cut into cubes.
- Sugar: A touch of sugar adds a hint of sweetness to the crust.
- Salt: A pinch of salt enhances the flavor and helps balance the sweetness.
Step 2: Combine the Ingredients
In a large mixing bowl, combine the flour, sugar, and salt. Add the chilled butter cubes to the bowl.
Step 3: Incorporate the Butter
Using a pastry cutter or your fingertips, work the butter into the dry ingredients until the mixture resembles coarse crumbs. Be careful not to overmix; you want small, pea-sized pieces of butter distributed throughout the dough.
Step 4: Add Cold Water
Gradually add cold water to the mixture, one tablespoon at a time, while gently tossing with a fork. Continue adding water until the dough begins to come together and can be formed into a ball.
Step 5: Form the Dough
Once the dough reaches the right consistency, transfer it to a clean, floured surface. Gather the dough into a ball and flatten it into a disk.
Step 6: Chill the Dough
Wrap the dough in plastic wrap and refrigerate it for at least 30 minutes. Chilling the dough allows the gluten to relax and the butter to firm up, resulting in a flakier crust.
Step 7: Roll Out the Crust
After chilling, remove the dough from the refrigerator and place it on a lightly floured surface. Use a rolling pin to roll out the dough into a circle, about 1/8 inch thick.
Our blog post on A closer look at freeze dried dehydrated foods comparison is a must-read for anyone interested in the subject. It’s filled with comprehensive details and thoughtful perspectives.
Step 8: Line Your Pie Pan
Carefully transfer the rolled-out dough to your pie pan, gently pressing it into the bottom and sides. Trim any excess dough and crimp the edges as desired.
Step 9: Blind Bake (Optional)
Depending on your pie recipe, you may need to blind bake the crust before adding the filling. Follow your recipe's instructions for blind baking, if necessary.
Step 10: Fill and Bake
Once your crust is prepared, fill it with your desired pie filling and bake according to your recipe's instructions.
Tips for Success:
- Keep Ingredients Cold: Cold ingredients, especially butter, are crucial for achieving a flaky crust.
- Don't Overwork the Dough: Handle the dough gently to avoid developing too much gluten, which can result in a tough crust.
- Chill, Chill, Chill: Refrigerating the dough at various stages helps maintain its texture and ensures a tender crust.
- Experiment with Flavors: Feel free to customize the crust by adding herbs, spices, or citrus zest for a unique twist.
Key Takeaways:
- Crafting homemade pie crust is a simple process that yields delicious results.
- Proper technique, including keeping ingredients cold and avoiding overworking the dough, is key to success.
- Experimentation and customization allow you to tailor the crust to suit your taste preferences and the pie filling.
FAQs:
Q: Can I make the pie crust dough ahead of time? A: Yes, you can prepare the dough in advance and refrigerate it for up to several days or freeze it for longer storage.
Q: Can I use a food processor to make the dough? A: Absolutely! A food processor can be used to quickly and efficiently incorporate the butter into the dry ingredients.
Q: How do I prevent the crust from shrinking during baking? A: To prevent shrinkage, be sure to chill the dough before baking and avoid stretching it when fitting it into the pie pan.
Q: What if I don't have a pastry cutter? A: If you don't have a pastry cutter, you can use your fingertips to rub the butter into the flour mixture until it resembles coarse crumbs.
Mastering Homemade Pie Crust: A Foolproof Recipe
4. Tips for Perfect Pie Crust
As you embark on your journey to master homemade pie crust, consider these invaluable tips and tricks to ensure your crusts turn out flawlessly every time. From ingredient variations to troubleshooting common issues, these insights will elevate your pie-making game to new heights.
1. Choose the Right Flour
- All-Purpose Flour: The go-to choice for most pie crust recipes, all-purpose flour strikes a balance between tenderness and structure.
- Pastry Flour: For an even more tender crust, consider using pastry flour, which has a lower protein content.
- Whole Wheat Flour: Add depth of flavor and a rustic touch by substituting a portion of all-purpose flour with whole wheat flour.
2. Mind the Butter
- Keep it Cold: Cold butter is essential for creating a flaky texture. Ensure your butter is well-chilled before incorporating it into the dough.
- Use the Right Size: Cut your butter into small cubes or grate it using a box grater for easier incorporation into the flour mixture.
- Avoid Overmixing: Stop mixing once the butter is the size of peas. Overmixing can result in a tough crust.
3. Add Vinegar or Vodka
- Vinegar: Adding a splash of vinegar to the dough helps inhibit gluten formation, resulting in a more tender crust.
- Vodka: Substitute a portion of the water with vodka for an even flakier crust. The alcohol evaporates during baking, leaving behind a tender, crisp texture.
4. Embrace the Food Processor
- Quick and Efficient: A food processor makes quick work of incorporating the butter into the flour mixture, resulting in a uniform texture.
- Chill the Blade: To keep the butter cold, chill the blade of the food processor before use.
5. Chill, Chill, Chill
- Refrigerate the Dough: After mixing, refrigerate the dough for at least 30 minutes before rolling it out. This allows the gluten to relax and the butter to firm up, making the dough easier to work with.
- Chill the Pie Pan: For an even flakier crust, chill the pie pan in the freezer before adding the dough.
6. Blind Baking Tips
- Use Pie Weights: Prevent the crust from puffing up during blind baking by using pie weights or dried beans to weigh down the dough.
- Dock the Dough: Prick the bottom of the crust with a fork before blind baking to allow steam to escape and prevent air bubbles.
7. Experiment with Flavors
- Add Herbs or Spices: Infuse your crust with additional flavor by incorporating herbs, spices, or citrus zest into the dough.
- Sweeten It Up: For sweet pies, consider adding a touch of sugar or vanilla extract to the dough for a subtle hint of sweetness.
8. Troubleshooting Tips
- Crumbly Dough: If your dough is too crumbly, add a tablespoon of cold water at a time until it comes together.
- Soggy Bottoms: To prevent a soggy bottom crust, brush the bottom of the crust with a beaten egg white before adding the filling.
Share Your Creations!
We love seeing your homemade pie crust creations! Share photos of your pies on social media and tag us @homesteadingfamily for a chance to be featured.
Key Takeaways:
- Choosing the right flour and keeping the butter cold are key to a flaky pie crust.
- Adding vinegar or vodka can enhance tenderness and flakiness.
- Experimenting with flavors and troubleshooting common issues can help you achieve the perfect pie crust every time.
FAQs:
Q: Can I freeze pie crust dough? A: Yes, pie crust dough can be wrapped tightly in plastic wrap and stored in the freezer for up to several months.
Q: How do I prevent the edges of the crust from burning? A: To prevent the edges from burning, cover them with aluminum foil halfway through the baking process or use a pie shield.
Q: Can I use oil instead of butter in pie crust? A: While butter contributes to flavor and flakiness, you can use vegetable shortening or a combination of butter and oil for a dairy-free option.
Q: Can I make pie crust gluten-free? A: Yes, you can substitute gluten-free flour for all-purpose flour to make a gluten-free pie crust. Ensure all other ingredients are gluten-free as well.